Mrs. T's Art Room
  • Mrs. T's Blog
  • Arts Integration
    • HOT Blocks
    • HOT Block Resources
    • Arts Integration Resources
  • Get Connected
    • Art Teacher Resources
    • Ed Tech Resources
    • Twitter for Educators
  • Professional Development
  • Other Sites

Flipping the Art Room: More Time for Student Work

3/9/2018

0 Comments

 
Do your students ask you for more time to create? Mine do! It is hard for my elementary artists to stop, clean up and then wait a whole week to start creating again. It is impossible to add more time for art in the schedule, but flipping the art room can really help.
Picture
Just last week, one of my fifth grade students tried to make more time to work: she added ten more minutes on the timer I had set to alert us it was clean up time. Good thing I realized this before the classroom teacher arrived! Nice try by a passionate artist.

There is a better way to find more time for students to create. Flipping a lesson means that students get more work time at school because they learn concepts before class starts. Since I teach in an elementary school, I do a modified flip by creating short videos that the class watches at the beginning of class. My students retain the information longer and can’t interrupt. Less interruptions = more time for them to work!
Picture
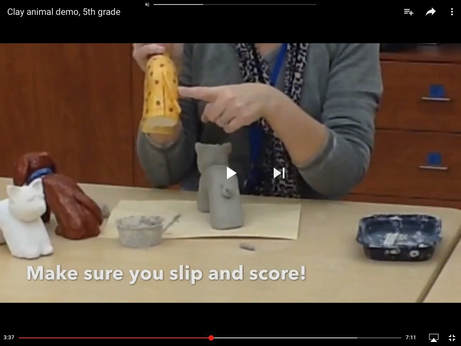
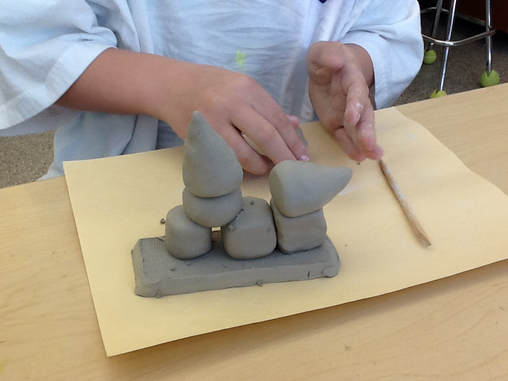
My first flipped lesson happened out of necessity. One particular class kept missing their art time for one reason or another. They were in the middle of a clay project and had to finish it because a holiday vacation was coming up. It was almost impossible to keep the clay workable that long! So I created a video, and sent them the link in Google Classroom to watch at home. At seven minutes long, it was a bit longer than I would have liked, but it got the job done. When my students came in the next day, they knew exactly what to do to finish their projects.​

Another good reason to me flip a lesson is because I know the demonstration will be too long. I created a timelapse video of making a craft stick basket. The students love this project, but it is challenging for some fifth grade students. To make sure they have enough class time to work, I have them watch this, a thirty minute process that is whittled down to three minutes!
So, how did I set this up? Like this:
Picture
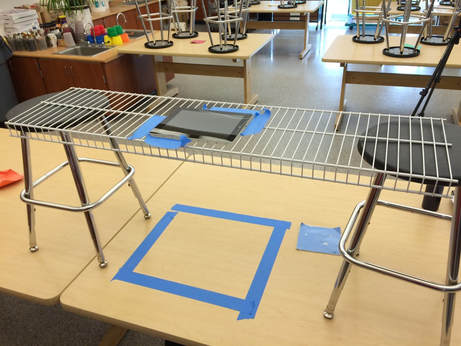
I found that recording this way was really easy, and the students could see exactly what I was doing. I used the time-lapse video setting on the camera and then edited the video in iMovie. No audio, just notes and a few titles that I created while I was editing. And the best part? Students could watch it again and again while I helped other students.

Give your students more time to create and maximize teacher-student interaction time. Try flipping a lesson and see how it works. No time to create a video? See if one already exists on YouTube!

Maybe your students will want to make a craft stick basket… I know there’s a decent video for that!


Let me know how it goes! Write a comment below 🙂

This post was first published on Education Closet, January 2017.

0 Comments

STEAM in the Art Room

8/17/2017

0 Comments

 
STEAM? Yes, please!

STEM is great, but STEAM adds an “A” for Art and design. While teaching twenty-first century skills, art and design should be integrated with science, technology, engineering and math. Students need to create and design objects that are functional, look good and work in an innovative, elegant way. Adding some scientific resources to incorporate STEAM in art will make learning while creating a natural combination for young artists.
Picture
Nature photo and student pastel
Young learners need to make cross-disciplinary connections: that’s why my art room will be a lot STEAMier this year. I’ve started using a different instructional approach called Teaching for Artistic Behavior (TAB), a nationally recognized choice-based art education model to teach art. My art room is now called “Art Studio 139” and has centers set up to explore drawing, painting, collage, architecture, and 3-D construction. Each student artist is responsible for his or her own materials, set-up and clean-up. The students will be working like “real artists” and will be given choice in the projects they create.


Throughout my years of teaching, I have been offering more and more choice within art lessons, so TAB is a natural extension. I also believe that children need a place to be able to create, explore, solve problems and succeed. I am excited to see how my students will flourish and grow as artists and problem solvers during this school year.
Arts integration has always been a necessary part of my teaching and learning throughout my career. It didn’t matter if  I was teaching Kindergarten, first grade or elementary art. It just made sense.

Why try to compartmentalize disciplines when they overlap and complement each other?


Last month, I attended a symposium at The Aldrich Contemporary Art Museum called “Full Steam Ahead” with two colleagues. I got a fabulous idea for adding STEAMy resources to the art studio for my students from a session by Neal Overstrom, the director the Nature Lab at the Rhode Island School of Design. The Nature Lab is a natural science collection and lending library where students have hands-on access to specimens such as shells, taxidermy animals and skeletons. There are also live plants and animals to support visual inquiry into biological and natural sciences. There are almost 80,000 individual specimens in the collection.
Picture
Pages from old nature books are a great visual resource
WHILE I WAS LISTENING TO NEAL, MY TAB ART ROOM AND ARTS INTEGRATION/STEAM SIDE CAME TOGETHER WITH A GREAT IDEA…If RISD students could have hands-on access to natural specimens, why couldn’t mine? Elementary students would LOVE examining natural materials. I started to make a list of items that would be appropriate scientific specimens for a K-5 art room:

  • Insects – how about some real specimens?
  • Animals – realistic plastic toys, I have some in the cellar (Don’t tell my son!)
  • Photos of animals, plants, etc – I have collected old books for this purpose.
  • Leaves – it is fall in New England, that one is easy! (Just collect some :)
  • Gourds, fruits and vegetables – the art room has these already.
  • Feathers – I’ll need to find some clean, natural feathers
  • Bones – I have a Mr. Thrifty skeleton already!


Students love the plastic fruits, vegetables and gourds. Imagine for a moment, twenty children setting up their own small still life at the same time! It is really something. Mr. Thrifty, the skeleton, will make his appearance this week. I wonder how the students will react to him. Some of the other items I plan to ask for in a grant from our local learning foundation.
Picture
Grade 3 student working on a still life
What do you think? Do you have any other ideas to add STEAM in the art classroom? What are some simple, inexpensive things you can do to promote the “A” in STEAM in your classroom or school? Let me know in the comments below!

*
the links provided are through the Amazon Affiliates program.

​
This blog was first posted on Education Closet, October, 2016

0 Comments

Get Animated with ChatterPix!

4/30/2017

0 Comments

 
Okay, teacher friends: during cleanup time, do your students remember to put the caps on the glue sticks? Do they put them on properly? Do they put them on at all? It seems that I always need to remind many of my elementary students to do this little chore without smashing the top of the glue stick into the cap. How could I get this point across to them in a way that students would remember?
The first thing I tried was modeling. I had my classroom puppet, Alien, explain how to open the glue stick, turn it up a bit, and turn it down before putting the cap on so you don’t squish the glue stick’s little “head.” Kindergarten and first grade students loved this, but it seemed that many students still “forgot.” Wasting glue is not good for the art budget. Repeating the same phrase over and over: not so good for the teacher’s brain.
Picture
I needed a clever way to help students remember to do this simple task. I love integrating technology into teaching and learning, and I discovered a really cool iOS app called ChatterPix Kids. I’m always on the lookout for new ideas to increase student engagement. Then it dawned on me that I could make a “talking” glue stick video to remind students about this procedure in the art room!

I took a photo of one of our glue sticks in an art supply basket I put at each table. Then I opened the ChatterPix app, chose my photo, then selected “next.” The app prompted me to draw a line where I wanted the mouth to appear and I tapped the record button to record my voice. I added sticker eyes and my talking glue stick came alive!
If you watched the video, you probably noticed that this glue stick has a man’s voice- not mine! That’s because when I got home to show my husband, he really wanted to create the voice for it, and I agreed. This way, the students know it is not me… it is the glue stick’s real voice (wink, wink)!  Honestly, glue stick etiquette has improved, and some students look for that talking glue stick in their supply basket!
In ChatterPix Kids, you have 30 seconds to record your voice, you can also add stickers and text. When your recording is complete, simply send it to your camera roll. It is an easy and engaging app for students to create their own animated image.
When I first discovered this app by Duck Duck Moose, I planned on having students use it to describe their art. Just think of the possibilities! Students can create art, take a picture of it and describe their process. In their classrooms, students can tell a story with this app, or take a picture of an inanimate object, give it a voice and embed it in a presentation.
True arts integration is teaching and learning through two or more different content areas. Across all grades and disciplines, students must learn to speak audibly and express their ideas clearly. This is written in the English Language Arts CCSS in Speaking and Listening. Creating audio recordings is encouraged and listed in those same standards starting in second grade.
In our new National Core Arts Standards, students are Creating, Presenting, Responding and Connecting. Within Presenting, students can use technology to exhibit their work, create new content and create digital portfolios. I have listed some of the CCSS and NCAS that align with this app below.
Do you have ideas for lessons that include ChatterPix or other ways to give a picture a voice? I’d love to hear about your creative lessons. Leave a comment below!

CCSS.ELA-LITERACY.SL.2.5
Create audio recordings of stories or poems; add drawings or other visual displays to stories or recounts of experiences when appropriate to clarify ideas, thoughts, and feelings.
CCSS.ELA-LITERACY.SL.4.5
Add audio recordings and visual displays to presentations when appropriate to enhance the development of main ideas or themes.
CCSS.ELA-LITERACY.SL.5.5
Include multimedia components (e.g., graphics, sound) and visual displays in presentations when appropriate to enhance the development of main ideas or themes.
CCSS.ELA-LITERACY.SL.11-12.5
Make strategic use of digital media (e.g., textual, graphical, audio, visual, and interactive elements) in presentations to enhance understanding of findings, reasoning, and evidence and to add interest.
NATIONAL CORE ARTS STANDARDS- Visual Arts
Anchor Standard 4: Select, analyze, and interpret artistic work for presentation.
VA:Pr4.1.3a
Visual Arts, Presenting, grade 3
Investigate and discuss possibilities and limitations of spaces, including electronic, for exhibiting artwork.
VA:Pr4.1.IIa
Visual Arts, Presenting, high school
Analyze, select, and critique personal artwork for a collection or portfolio presentation.

​This post was first published on Education Closet.
0 Comments

    Amy Traggianese

    Visual art and arts integration with a techie twist!
     
    I don't like disclaimers, but: none of my ideas expressed in this blog post or website are supported or endorsed in any manner by my employer or anyone else. I just write it as I see it, and that is that.

    Picture
    Picture
    Picture

    This website uses marketing and tracking technologies. Opting out of this will opt you out of all cookies, except for those needed to run the website. Note that some products may not work as well without tracking cookies.

    Opt Out of Cookies
    Picture

    Archives

    July 2018
    June 2018
    May 2018
    April 2018
    March 2018
    February 2018
    January 2018
    November 2017
    August 2017
    April 2017
    November 2016
    September 2016
    March 2016
    January 2016
    October 2015
    August 2015
    July 2015
    June 2015
    April 2015
    March 2015
    February 2015
    January 2015
    November 2014
    October 2014
    September 2014
    August 2014
    June 2014
    May 2014
    January 2014
    December 2013
    November 2013

    Categories

    All
    Art Ed Bloggers Network
    Arts Integration
    Bottle Cap Mural
    Cave Art
    CCSS
    Choice Art Studio (TAB)
    EdCamp
    EdTech
    First Grade
    GAFE
    Henna
    NCAS
    NGSS
    Online Resources
    PLN
    STEAM
    Teaching Art
    Twitter
    Video
    What Is Art?

    Picture
    Picture

    RSS Feed

    This page contains affiliate links from Amazon.
    We earn a small percentage of the sales made through these links at no extra cost to you.
    Thanks for your support.
Powered by Create your own unique website with customizable templates.